Thursday, 26 January 2017

Just 5 Minutes


Do you have those days where everything goes at full pelt and all you want to do is sit for 5 minutes and do nothing to then have it interrupted by your partner / husband and then a full blown guilt trip takes over?

I love my Fridays off work, and I couldn't believe it over the Christmas period when I was having one of my mad clearing out sessions, that I had in fact had a 4 day working week in my main job for 3 years!

I can't even recall where those 3 years have gone, but boy have I enjoyed those Fridays to myself to be able to get up and do what I want with no interruptions from my partner asking what I'm doing, when will dinner be ready, and can you just ....................

I initially took the Fridays off to help my partner with his bookwork as it was too much in the evenings after both of us working full time, and the last thing we both wanted to do was create invoices and quotes until the early hours. So I decided that Fridays were the answer and then where possible to squeeze in long weekends away (BTW, that hasn't happened).

Over the 3 years I have managed to just do the paperwork on a Friday morning by 9.00am and then the rest of the day is my own, and I have been able to get creative, source vintage finds, do 1 day classes and meet some of my followers on Instagram who live locally to me for a coffee, but best of all I have been able to meet up with friends and family that I could only do when it was the School Holidays.

The quality and balance that this has made to my life far out ways the 5 day week that I was doing and working on a Friday for nothing! Yes, you read right nothing. When I worked out my tax, national insurance and pension, I was actually giving my work place a day a week for nothing. So over the years how many free days have I worked? it really doesn't bare thinking about.

So, if you do want to just sit for 5 minutes maybe take that time to work out what can you do to make your life better and less stressful, maybe working out your finances and seeing if you can afford that magical day off to yourself is the answer - you wont regret it.

So tomorrow you will find me having the sparkles covered over, and then an afternoon of rummaging in my favourite vintage warehouse looking for treasure.

Have a wonderful weekend and week.

Sarah x


Thursday, 12 January 2017

Upcycling Yankee Candle Jars

Who doesn't love a Yankee candle? Or in my case more than just the one!

So i got thinking the other day after all the Christmas candle jars were finished with, surely these jars can be reused to store items in especially the tealights and votives that end up lying around or sitting in boxes not looking too attractive.

If you have these candle jars you may have tried to take the label off to then discover that they are stuck fast and no amount of trying will make it budge, but there is now a solution .......

It is time consuming in the length of time that it takes, but the end result are fab jars that you can either leave plain, paint (that will follow in another post when the weather is warmer) or add a ribbon.

Lets get started.....

I had a large and a small jar to work with and I had to remove the remaining wax left in the bottom.

This can be achieved by removing the metal disc at the bottom, and breaking the set wax with the end of a dessert spoon (you can make wax melts with the remaining).

Then i started to remove the labels by finding a corner that was easy to pull gently. The more of the label that you can remove at this point will make it easier to remove along the way.

I then just used a craft knife to score the labels, but not the jar, so don't score too deep, you just want to make the label easier to remove and to allow the water to get underneath the label.


You then have to make a hot soapy solution of washing up liquid and then 2 large scoops of Vanish Oxi Stain Remover either in your kitchen sink or in a bucket or bowl that is deep enough to cover most of the jar / jars.

Give the solution a good swirl to mix and agitate and place the jars in with the labels facing down or completely covered. It will not work if the labels are not in the solution properly.

Then leave them to soak for about 2 hours so that the solution starts to get into the label.

When you think the solution has started to work, take the jars out and start to peel back the labels, this will be slippery. I wore rubber gloves to hold the jar and to grab a corner of the label. When you have taken off as much as possible, either use a window scraper that painters use to remove paint from windows and try to take off some more, or again your craft knife. Please DO NOT use a razor blade, the jars are too slippery and you could end up with a nasty accident. 


When you have removed as much as possible, place the jars back in the solution and leave for another hour. then repeat if you still have quite a bit of the label remaining. The bottom label will come off in the first step.

When you have removed as much as possible, you should be left with a clear glue film where the label was. To remove you will need a green scouring pad and a squeeze of washing liquid on the glue. Just rub over to cover and then with the scourer just rub gently and you will see that the glue comes off really easily. Rinse and dry or place in your dishwasher and you are then left with fab empty jars to use for lots of bits and bobs.

I used mine for storing tealights and votives (not suitable for food storage) but i will also be using more when they are available for craft bits and bobs.    


Saturday, 7 January 2017

New Year, New Blog Posts 

OMG, i have neglected this little blog for over 2 years, where have they gone?

I started the Blog when i was just starting up Beautiful and Homely and somehow other things had got in the way and at certain times i was busy making bunting, drawstring bags and other handmade goodies that somehow the Blog took a retreat to the back burner.

But it's now 2017 and i intend to occasionally blog about either myself, crafts that i have learnt along the way or handy tips that could make your life a whole lot easier.

So heres to a better 2017 on the blog and if you really miss what i am up to you will find me nearly everyday on Instagram and by clicking the link on the right you will be taken straight into my little world of squares or www.instagram.com/beautiful_and_homely

Happy New Year to you all

Sarah x


Sunday, 2 November 2014

Spaghetti v Pompom

Miniature Pompoms
Now I love a pompom or 2 and I've tried many an implement to make them, as you will know from one of my previous posts, but when I was stuck and bored and wanted to make something, I tried to make my own out of 2 metal skewer sticks! I know not the brightest idea, but I honestly thought that if I had a circle with 2 halves it would be easy! Then I read about making pompoms with a kitchen fork. The results are fantastic and to be honest I think they are better than using any of the pompom makers that I have purchased.


So to get started you need a 4 ply or DK wool, i haven't tried anything thinner, but i find these work best for pompoms to get the fluffy effect. A normal dinner fork or a large salad fork if you wanted to make a bigger pompom are all that you need. Then you get an approx 6" length of the wool and put it through the middle prong and hold it in place with your thumb. This is needed to tie the other end together to secure. Then you just wind the wool around the fork, as if you were winding up spaghetti. I did this 50 - 60 times to get a denser pompom, but if you wanted a smaller and thinner pompom 30 - 40 would be fine, but not less than that, otherwise you won't have any wool to trim afterwards. Once you have wound the wool like spaghetti around the prongs of the fork you then have to cut and tie the to lengths together on the side of the fork. I did this in a double knot just so it doesn't come apart.

Then you need to push the wound wool up the fork so that you can thread some wool in the prong and over to get a bow effect. So to do this you need a short length of the wool or a matching thread that is quite strong  and tie this through the middle
 prong as shown and i found that if i tied this at the front and again at the back it gave a stronger hold. Do not snip off this tread as you will need this to either sew onto jumpers etc, or as i do to tie onto parcels, presents etc.

Then you take the bundle off the fork, snip off close to the knot on the side the threads that you tied to hold in place, but not the threads that you tied and then as with a pompom maker start snipping around the looped edges, being careful not to snip your middle threads (believe me its easily done!) I found that it was easier to do this with a thin sharp pair of hairdresser scissors so that you can get into the little bundle and not spoil or snip the middle thread.


Once you have snipped all the edges, hold the pompom quite flat so you have the dense part in your fingers and then start to snip off around the edges all the long threads and you will start to see the pompom taking shape. If you are happy with your shape after this then just take the long threads and give the pompom a good shake to get the ball effect and you have a mini pompom. I prefer to then carry on cutting the pompom all over giving it a good hair cut so that the pompom gets a denser effect 
and you end up with a pompom massacre on your hands. All the trimmings can be kept in a plastic bag and then mixed in with your stuffing for other projects or save it up and in the spring put it on the grass for the nesting birds to use. A win win situation for all those involved in the addictive process of pompom making.


Remember you can follow daily updates on my Instagram page by clicking on my pushbutton about my little world, or Facebook www.facebook.com/beautifulandhomely about Beautiful & Homely and upcoming events or pop into my online shop for a world of handmade goodies, Shabby Chic gifts, Vintage and Retro delights www.beautifulandhomley.com

Wednesday, 6 August 2014

Wherefore art thou?

So i have neglected you my Blog for nearly an month, i'm sorry but i have my reasons........

The most important was my birthday way back in July, god that sounds like it was months away, but on reflection it was only 12th July, where have those weeks gone?

I also have fitted in House Sitting for a friend in Eastbourne as they have a new puppy and that was quite eventful, no electric for a whole day and a cat that got stuck on another house-owners roof, quite an eventful full days, and without my trusted sewing machine, i was starting to go stir crazy and i was feeling trapped as i didn't take my car either due to taking the train, but i did catch up on my book club reading and catch a few rays before i go on holiday later this month.

So as you may remember i was making bits and pieces to hang up including my bunting as shown in a previous posting and then i made the Laura Ashley www.lauraashley.com paper pom-poms that i had bought in their summer sale. Whilst they were quite easy to make, i think if i was honest that i would not have paid the £10.00 that they were originally, but the £7.00 in the sale seemed fair, but they were effective and i have used them since at my Opening Event for Beautiful & Homely www.facebook.com/beautifulandhomely 

This is my new business for selling online Shabby Chic and homemade items (webpage being created) and also Home Parties and over time i will be adding dare i say the word..... Christmas decorations, some are already on there! The idea is for people to be able to buy small objects of Shabby Chic for their home and garden and unusual gifts. I have been selling via Instagram - link on Blog and also Facebook, along with many pictures of all the items that i have at the moment. I also had an Open Day Event on 2nd August to show off the items that i am selling so that my customers can see the quality of the goods that are for sale and also to talk about the ideas for the parties or coffee mornings. I am also going to be working 4 days from September so that i can concentrate on the business and find some customers who would be interested in having a Shabby Chic Home party. Another idea is to be able to invite customers who prefer not to host a party come to my home on a Friday where they can by appointment browse the items and for  £3.50 have tea and cake in vintage tea cups and saucers giving the whole Shabby Chic effect.

Just a small showing from the Open Event


So this a short synopsis of why i have neglected my blog for nearly a month, i promise that i won't be doing that again, as today to teach me a lesson it has been playing up and not playing ball with the type and pictures and instead of the normal 30 minutes or so it has taken up most of my morning playing around with type, pictures, justifying, undoing and getting advice from the virtual friends on Instagram....but hey i've posted, it maybe short and sweet but its done, and the rest of the day is mine to sort before jetting off.....................


Sunday, 13 July 2014

Cry Baby Bunting

So i have neglected my Blog for a few weeks, but i have my reasons, and no not being lazy, if only.
I have been busy with birthday celebrations and i went away for a long weekend to Spain, but normality is resumed this late on a Sunday night and i have today completed the bunting that i started as my project a few weeks ago and mentioned in a previous post.
So as a novice and with a new sewing machine for my birthday i thought what could i try to make that wouldn't take too long and would have good visual effect and that nobody would have to look too closely to see my mistakes...............bunting! 

I first sourced in a charity shop a few weeks ago some lovely chair back and arm covers for 80p, and when looking at them noticed that if i put a triangle template on them i could keep the embroidered pattern and use as the main focus for the bunting and still giving a vintage feel.
Charity Shop Finds

Bunting Template - Large
I then downloaded a bunting template from www.housetohome.co.uk which had 2 different sizes on the template, i chose the larger flag as this allowed for the floral pattern, but i have since cut smaller bunting in a striped fabric. and then pinned onto the chair cover. As i had 7 covers i cut all 7 and then as they were too thin for bunting i then cut another 7 for backs and then another 4 in plain to make up 2 extra, 1 for each end to make the bunting longer. I used pinking shears that i had bought at Hobbycraft. Of course your bunting can be any length and any assortment of materials, but i wanted to keep the theme of the vintage chair backs. Once i had all the triangles i then pinned all of the backs to each one.

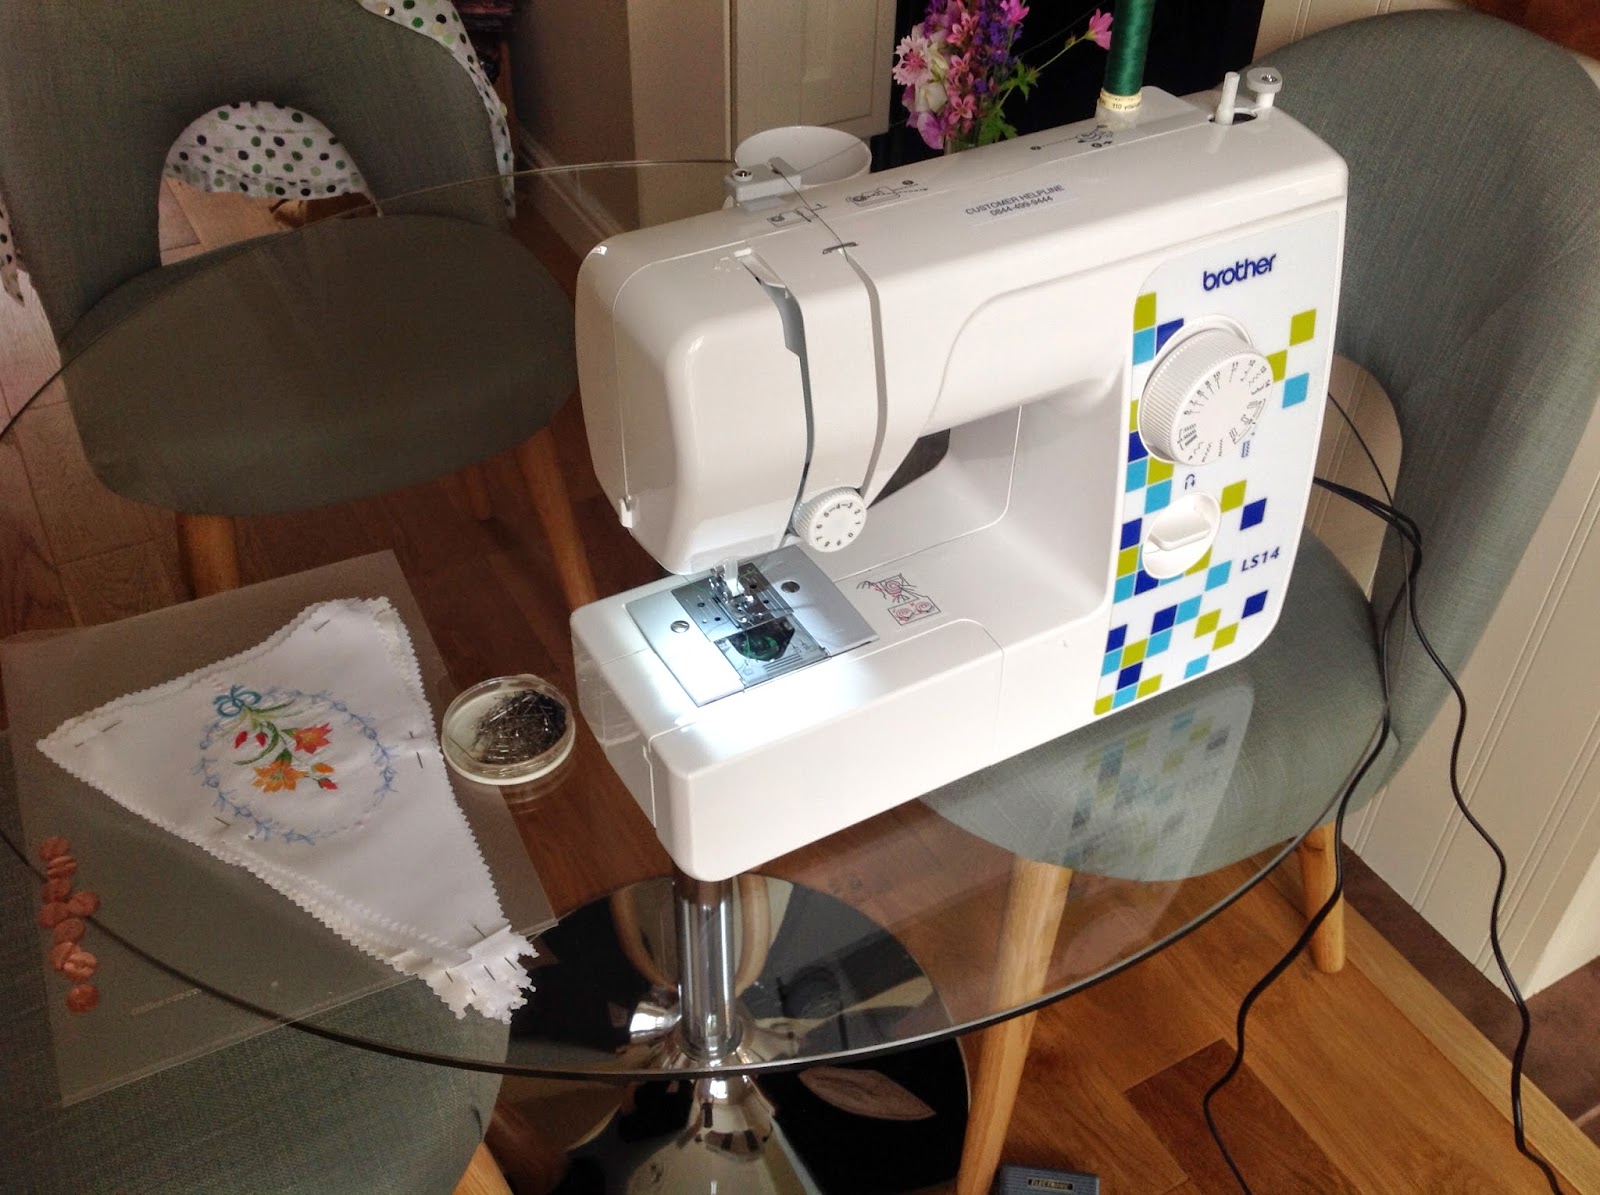
Next it was time to get sewing with my new Brother LS14 sewing machine. I must admit i did have a few problems 
with this machine and the bobbin kept sewing loose stitches so a few swear words were thrown into the equation, 
but after a bit of practice and finally sorting out the bobbin i was well away and sewing the triangles in a matching 
green thread as a contrast  against the white material and picking out the green from the flower stems.

Brother LS14 Sewing Machine
I was going to use ribbon that i had bought previously from Aint Too Shabby who you will find on Facebook and 
Instagram, but it was 2.5m long and not long enough for the amount of flags i had made, so i went to my local 
haberdashers in Coulsdon - www.artandcraftvalley.com  and bought 4m of 13mm bias binding. This is a tip i will
remember for future use and i will probably keep the bias binding in my stock as it was easy to use and comes in 
longer lengths than a reel of ribbon and isn't too expensive. 

I then ironed the bias binding in half and placed each flag 4" apart, pinning as i went but you can do them closer, its
up to you, but they must be evenly placed, i also left 40cm at each end for tying to trees etc, but again you can 
extend on this. Once i got going with the sewing machine and remembering to take out the pins before they went 
under the foot of the machine i was well away and the bunting was completed, not to perfection, but not bad for a 
first attempt.

Triangles ready to Go
Pot - Waitrose
Pinned, ready to Sew
The Finished Product

Monday, 30 June 2014

Wow I Need A Day Off

That's it, i've done it, from September i will be working 4 days in the office at work and then on a Friday it will be me and my new goodies, along with the scarves if they behave themselves in the big world of commerce and small business - yikes!!! I will be starting with a small shopping event at a local school in July and then i am going to be doing a table top stall at a children's nursery during the school holidays to get the feel of it all - small apples grow into big trees and then the nursery - Little Lambs have offered for me to go along every Friday to get myself established. So i hear you ask what are you going to be selling on this new venture of mine? Here are some of the pictures that i have loaded so far out  of the vast amount of stock that is residing in my kitchen, all tagged, priced and ready to go.
Sass & Belle Hanging Decorations

I already had have these type of hanging decorations in my home all year round and at the moment they  are brightening up my bookshelf in the office, just simply hanging there on cup-hooks, which then means i can move them around to suit, or change them over with other hanging decorations. 


I will also be selling these beautiful bags and coin purses, the purses are quite large so could also be used as a makeup bag for the essential bits that you carry around with you in your bag, or a pretty way to disguise your monthly items, that always seem to end up falling out at the most impromptu moments!
Sass & Belle Butterfly Canvas Bag
Sass & Belle Canvas Coin Purse

I have picked out a few vintage inspired items that are cheap and to encourage people to look at my stall. I always find that when i go to shops, stalls etc i feel overwhelmed when i can only see the expensive items, and i just walk away. I want my customers to feel that they can browse and still take a little something away with them. Hopefully they will feel good that they are helping a small business and i will feel happy that i have made their day a bit cheerier! 
Vintage Notebooks x 4 Designs
Curiosity Hooks x 3 Designs
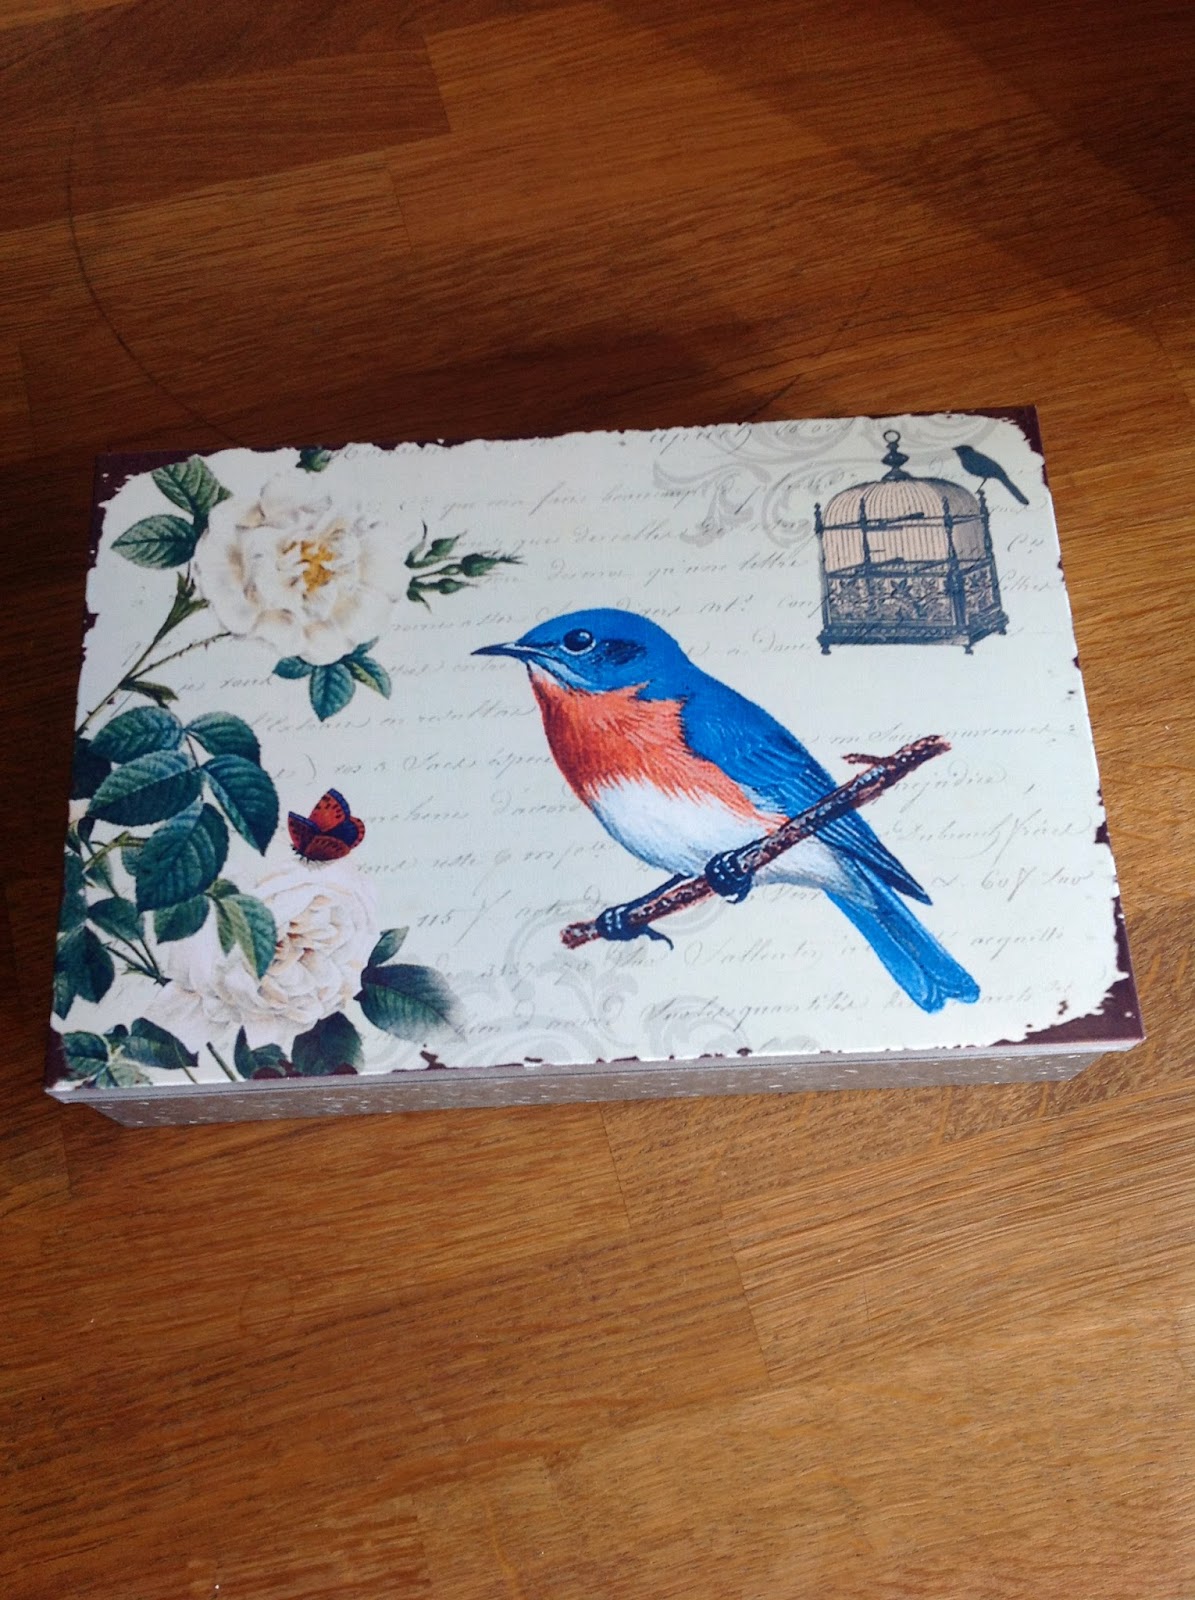
Vintage Inspired Bird Tin
Would you buy these items, would you like to buy any of these items? i can be contacted via my Instagram or Facebook or leave a comment below.

Wish me luck :)